
Installing Your Landscaping Plan
Installation is normally scheduled to start three to four weeks from the date of the contract signing, and usually takes between three days and a week to accomplish. Leisure Landscapes takes care of notifying the utilities for marking the property, schedules the delivery of materials and uses our own experienced labor to complete the job. Once the job is completed, you receive your written warranty agreement and the final bill for payment.
Prior To Installation
Five days prior to the installation, a utility locator service is called to mark the locations of the gas, power, cable and telephone lines. If permits are required, the applications are prepared and submitted along with the permit fees. The plumbing contractor is notified and scheduled for the backflow preventer hook-up and certification. Two days out, the irrigation distributor is contacted to prepare to deliver the irrigation system components. For landscape installations, the process begins with bed definition. The plan is utilized to mark out the bed layout and a trench is dug to mark the lines. Plantings that are not to remain are transplanted or removed to a staging area. Weeds and unwanted grass are treated with an application of round-up.
Hardscaping
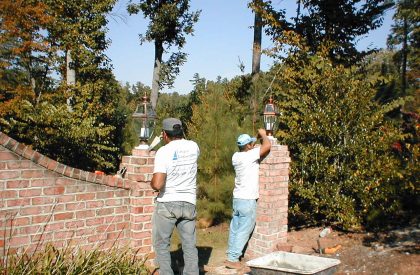
Hardscape items such as decks, retaining walls, brick or stone patios are installed next. Product is either delivered by the supplier or brought on site by the Leisure installation crew. The site is excavated, paying particular attention to maintaining a proper grade for water run-off. Potential landlocked areas are identified and 4″ corrugated pipe is installed to provide proper drainage. PVC plastic sleeves are installed to provide a route for irrigation or electrical lines. Finally, the hardscape item is constructed and the worksite is cleared of construction debris.
Irrigation
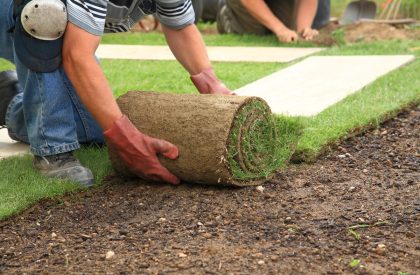
If the contract calls for irrigation, it is installed at this time. The heads are located on the property according to the plan. Tarps are layed parallel to location of the irrigation lines and the sod is hand cut and placed on the tarps. A trench is dug to the required depth and the dirt is place on the tarp. The plumbing contractor connects the backflow preventer and certifies the performance within specifications. The inspections division is notified to conduct the plumbing inspection. The remainder of the system is installed by the irrigation technicians, including the electronic valves, the sprinkler heads, the electronic cable, controller and rain sensor switch. As the lines are installed, the dirt is replaced in the trench and the sod is water in. The spray pattern for the sprinkler heads is adjusted and the controller is programmed. By the end of the third day, the system is installed and the installation cuts are virtually invisible. The owner is instructed on the operation of the system, delivered the backflow instructions, As-built diagram, system warranty and final bill.
Bringing It All Together
The landscape installation is resumed. Large planting materials are installed first (Unless it is a summer installation, in which case the field-dug trees will be postponed until cooler fall weather). Holes are excavated to half the depth of the planting ball and topsoil blended with sand and pine bark mulch are mounded around the plant to the height of the root ball. Accent lighting is installed next, with location of the fixtures first and then interconnection with the lighting cable. The transformer/controller is located in an accessible, but out-of-the-way place. Finally, all the beds are covered with a layer of double-shredded hardwood mulch or pine straw as specified in the Landscape Plan. All pots, tools and miscellaneous items are removed from the worksite, and the walks and driveway are blown clean.
Owner Tour
The owner is taken on a tour of the new landscape and provided with written plant care instructions outlining the one-year warranty and the final bill.

